Viewing Inspection Results
You can view an inspection at any point during the inspection's life cycle. This article will take your through the different components of viewing an inspection, and the data that you can review.
The components of the inspection you can review are as follows:
- Messages: The SMS messages sent to the recipient.
- List Items: The list items of the inspection.
- Responses: The recipient's responses to the inspection and the data associated with them.
- Response Map: A map displaying the capture locations of the inspection.
- Setting the Outcome: Setting the outcome of the inspection.
- Exporting: Exporting the inspection's data.
Viewing Messages
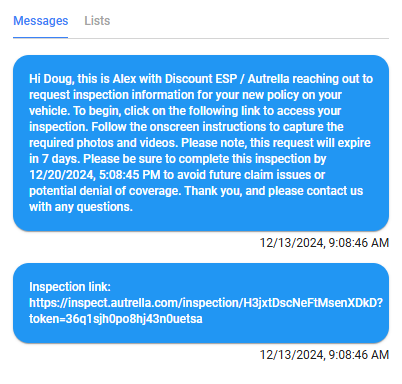
All SMS messages that are sent to a recipient are tracked and timestamped. You can view these messages in the messages box.
Viewing List Items
In the same box as messages, you can click on the "List Items" tab to open the list items that are in the inspection.
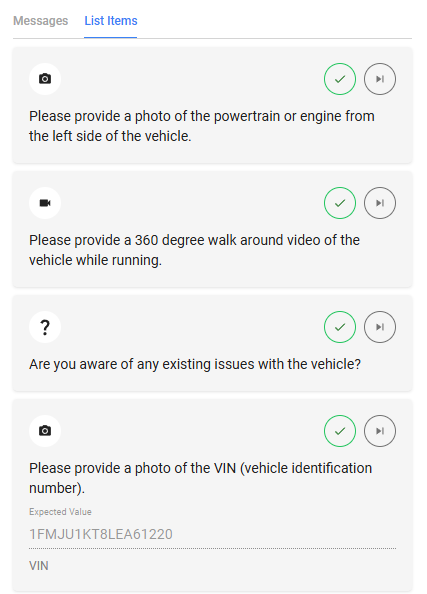
Components of a List Item
Each list item will display the item request type, the request description, the submission status of that item, and the skip/undo skip button.
- Request Type: Possible display values are: ,,or
- Submission Status: Possible display values are: ,,or(Only if item was skipped)
- Skip and Undo Skip: Clickingwill skip the item and hide it from the recipient. Clickingwill undo the skip and show the item to the recipient.
If your list item has an expected range or value, you will be able to view that range/value and its range/value type under the request description.
Temporary list items will also appear under the List Items tab. Rather than skippable, temporary list items are completely removable. To add a temporary list item, navigate to the dropdown at the top right of the screen, then click "Request More".
Temporary list items are not persistent throughout your organizaion, meaning if you want them to be permanently added to your inspections, you will need to add them as an item in your list settings. See Creating Lists.
Viewing Responses
In the center of the inspection screen, you will be able to view the submitted responses. Each video and photo response will have a snippet of the response, called a thumbnail, making it easier to view responses quickly.
If a response has not been submitted, it will not appear in the responses column. You can view the unsubmitted responses in the List Items tab. Clicking on the response will open the response data drawer. Only images and videos are clickable.
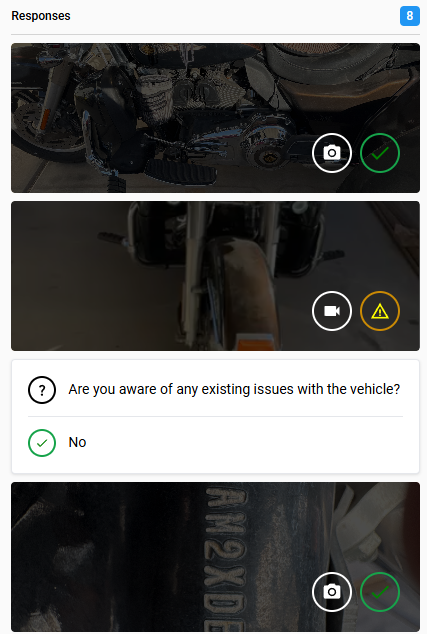
The Response Column
The responses column displays all of the submitted responses, along with their type, status, and a snippet of the response if it is a video or photo, or the question and answer if it is a question item.
- Request Type: Possible display values are: ,,or
- Submission Status: Possible display values are: (Failed), (Pass),or (Needs Review)
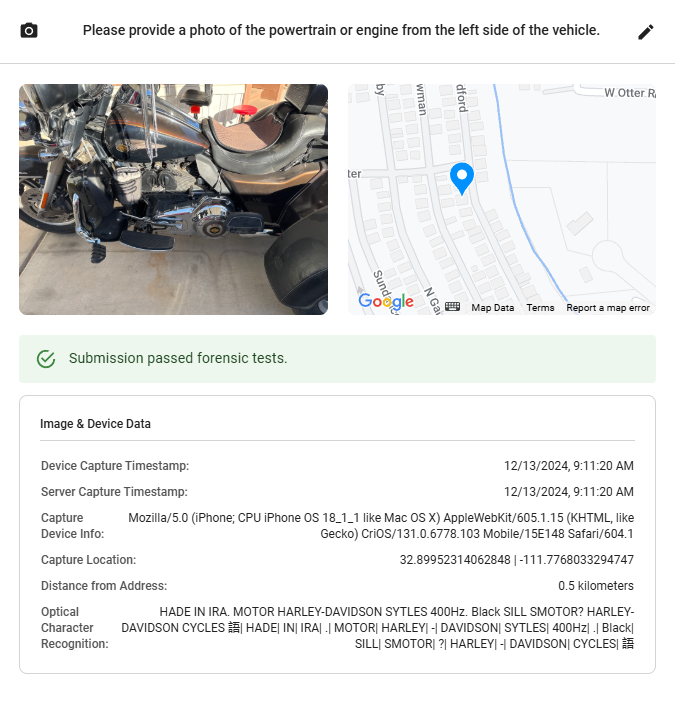
The Response Data Drawer
Clicking on a photo or video response in the responses column will open the response data drawer. The data within the response drawer includes:
- Response Image: A clickable response image or video that will enlarge when clicked.
- Response Map: A map that displays the capture location of the response via a blue pin. Zooming out will reveal the recipients address, marked by a gray pin.
- Response Status: Possible display values are: (Failed), (Pass),or (Needs Review)
- Response Reason: If a response has failed, the reason will be displayed next to the response status. Otherwise this field will say "Submission passed forensics tests" if the response passed.
- Image & Device Data: Information about the submission including the server and device timestamps, the capture device information, the capture location, the distance from the address in kilometers, and the optical character recognition (OCR) data.
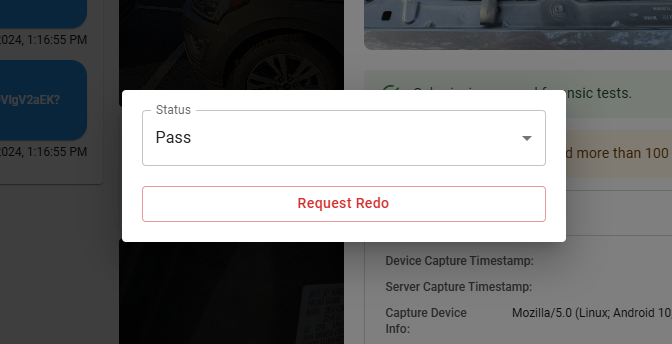
Manual Status Updates & Redos
Clicking the button will prompt the status and redo dialog. Requesting a redo will notify the recipient of a failed item that needs to be redone, and if the inspection is expired, it will reset the expiration to 7 days in the future.
Viewing Response Locations
You can view the capture locations of all the responses, and the recipients address via the response map column on the far right of the screen.
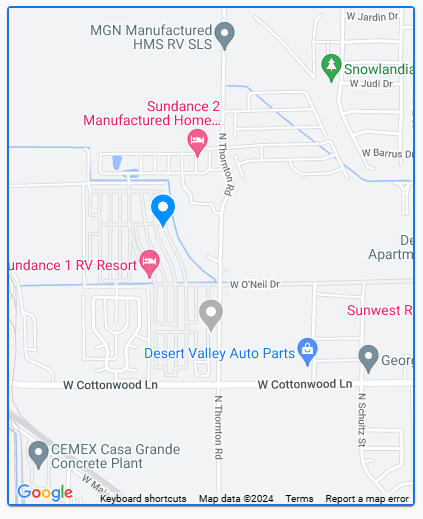
Reading the Map
Each list item will display the item request type, the request description, the submission status of that item, and the skip/undo skip button.
- Blue Pin: The capture location of each video and photo response.
- Gray Pin: The recipient's address.
Setting the Inspection Outcome
Up until now, you haven't been able to utilize the outcome sets you have created in previous learn articles. If you want to learn more about how to create and manage outcome sets, read Creating and Managing Outcome Sets.
Setting an outcome allows your to better organize inspections based on a manually set outcome. Setting an outcome set is not a required action, but it is a recommended practice.
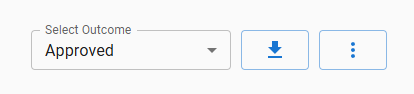
Each outcome you have set in your outcome set will be displayed as an option in the Select Outcome selector. Once setting an outcome and unfocusing the field, the outcome will save automatically. After you have set the initial outcome, you will not be able to set the outcome back to nothing.
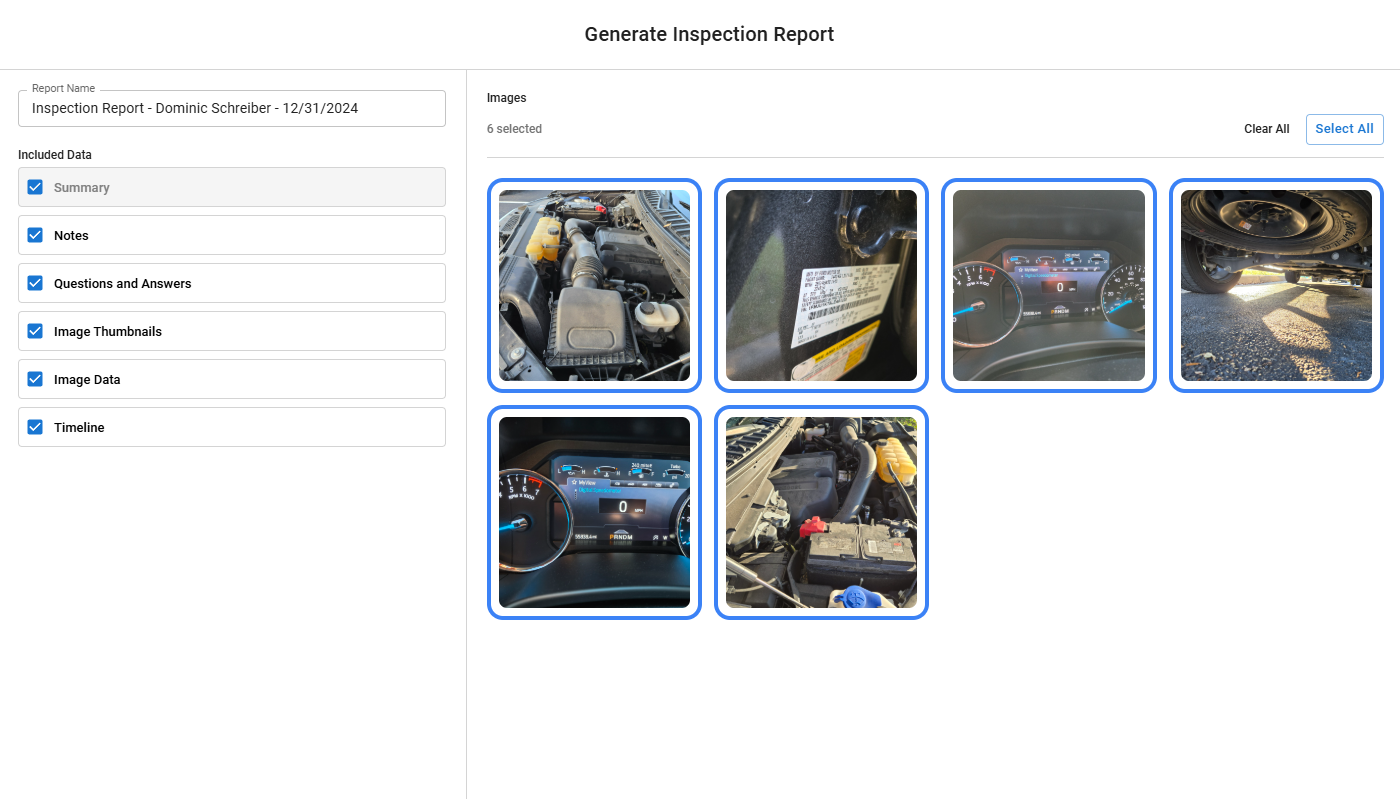
Exporting an Inspection
To export an inspection, click button in the top right of the inspection screen.
You can configure your export and its included data in the export screen. Here are the following configurations:
- Report Name: This is automatically generated and is changeable by clicking on the name.
- Selected Images You can choose which images are included in the report by clicking them in the main area of export screen. You can choose to include all images, only the failed images, or only the passed images.
- Notes: Choose to include any inspection notes.
- Questions and Answers: You can choose to include any Q&A response items in the report.
- Image Thumbnails: If you only want to include the response data, you can uncheck the image thumbnail box, which will only include the response data in the report.
- Image Data: Similarly, you can uncheck the image data box to only include the image thumbnails in the report.
- Timeline: You can choose to include the timeline of events in the report.